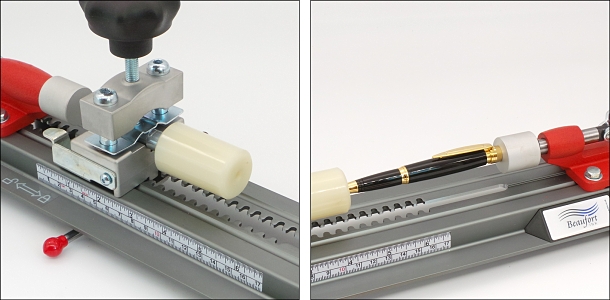
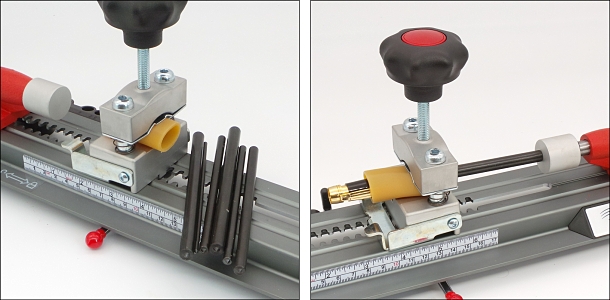
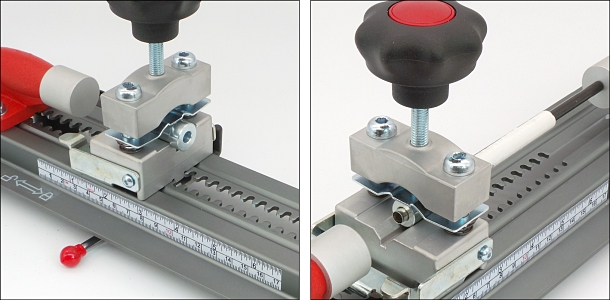
OUT OF THE BOX
- Fit the Piston Buffer Handle (F) to the lever on the Piston Buffer Carriage (E) and secure it with the Handle Fixing Screw (G)
- Screw the Clamp Adjustment Knob (D) into the top of the Sliding Sled (C)
- Keep the Gripping Tube (J) safe and place the remaining parts in the storage area to the rear of the pen press
- You’re good to go
PEN KIT ASSEMBLY MODE
Fit the
Spring Loaded Buffer (I) to the
Sliding Sled (C), so that it faces the
Piston Buffer (E), and screw down the
Clamping Knob (D) to secure it in place.
Lift the
Sled Position Change Tabs (B) and move the Sled to the desired position, according to the length of the tube you are pressing.
Move the
Sled Locking Lever (H) to the right, to lock the Sliding Sled in place.
Gently place the pen component into the turned and finished tube, hold the two against the Spring Loaded Buffer, and slowly operate the Piston Buffer to press the component into the tube.
Most pen kits will press together fairly easily, but some can be a bit stiff. If you feel that you are exerting too much pressure on the Sliding Sled, the Rear Buffer (A) can be extended to support the Sliding Sled. Note that both the Piston and Rear Buffers will extend still further by unscrewing them on the rods that pass through their respective carriages.
The Sliding Sled can be removed completely by undoing the nuts on the underside of the frame. In normal circumstances, the distance between the Sled and the Piston buffer is more than ample for pressing pens together, but the distance can be increased to 215mm by removing the sled.
PEN KIT DISASSEMBLY MODE
Pen kits can usually be taken apart, and the trick is knowing how to do it, or working out a way to do it. In most cases though, it can be achieved by passing a rod up the inside of the pen tube, to engage on the component at the opposite end, then exerting pressure on the rod to push out the component.
To prepare your pen press for disassembly, first cut a length of the
Gripping Tube (J). About 50mm will be enough, as its purpose is to protect the turned finish on the pen whilst gripping the pen inside the clamp on the Sliding Sled. It is not necessary to cover the entire pen with the tube, just the part that is held in the clamp. The remainder of the Gripping Tube can be stored as a spare, should it ever be needed in the future.
Place the pen inside the cut length of Gripping Tube, and clamp it in the Sliding sled, so that the end that will have the rod inserted, faces the Piston Buffer. If you need more space inside the clamp you can slacken the two hex nuts that hold the clamp in place.
Choose the widest
Disassembly Rod (L) that will fit through the hole you have available. If components are fitted at both ends of the tube, the size of the rod will be limited by the inside diameter of the one through which you have to pass it. You need to be mindful of damaging that component, and you need to think through which one it is sensible to press out first. It is best to engage the rod on the shoulder of the tenon of the component at the other end, so sometimes a narrower rod is better if both components are in place, to get a better angle at the other end.
Move the Sliding Sled to an appropriate position and lock it in place with Sled Locking lever
Insert the appropriate Disassembly Rod and gently operate the Piston Buffer to exert pressure on the Rod, to press out the component.
The press can be used in conjunction with your own transfer punches if you have them.
A WORD ON SLIMLINES
To dismantle a slimline pen, or any pen with a 7mm mechanism, which also includes Streamlines, first follow the above instructions using the 3mm Disassembly Rod to pass though the mechanism, in order to remove the nib section.
Once that is out, remove the Gripping Tube and fit the
7mm Mechanism Removal Bush (K) to the Sliding Sled. Clamp it in place, so that the wider part faces the Piston Buffer. Insert the pen mechanism into the bush so that the turned pen butts up against the bush.
Use the 6mm Disassembly Rod to press out the mechanism.


